
Beautifully Penned Meets Pierced Blooms

If you've overlooked the Beautifully Penned Designer Series Paper in the Sale-a-Bration catalog, you are not alone. This gorgeous black and white paper is designed to go with the Hand Penned bundle in the July-December Mini Catalog, but as you can see it makes a great backdrop for almost anything. I've used it here with the Pierced Blooms dies and In Bloom stamp set but this paper is very versatile and can be colored with Blends or Sponge Daubers or Blending Brushes--the possibilities are truly endless. As you can see above, I also used my favorite Sale-a-Bration FREE item, the Be Dazzling paper. I also used the same paper and stamp set and dies to make the similar card below. It's amazing how different it looks using different products. Which do you like better? The blinged-out version above or the colorful version below?
Let's make the first card. First gather your supplies:
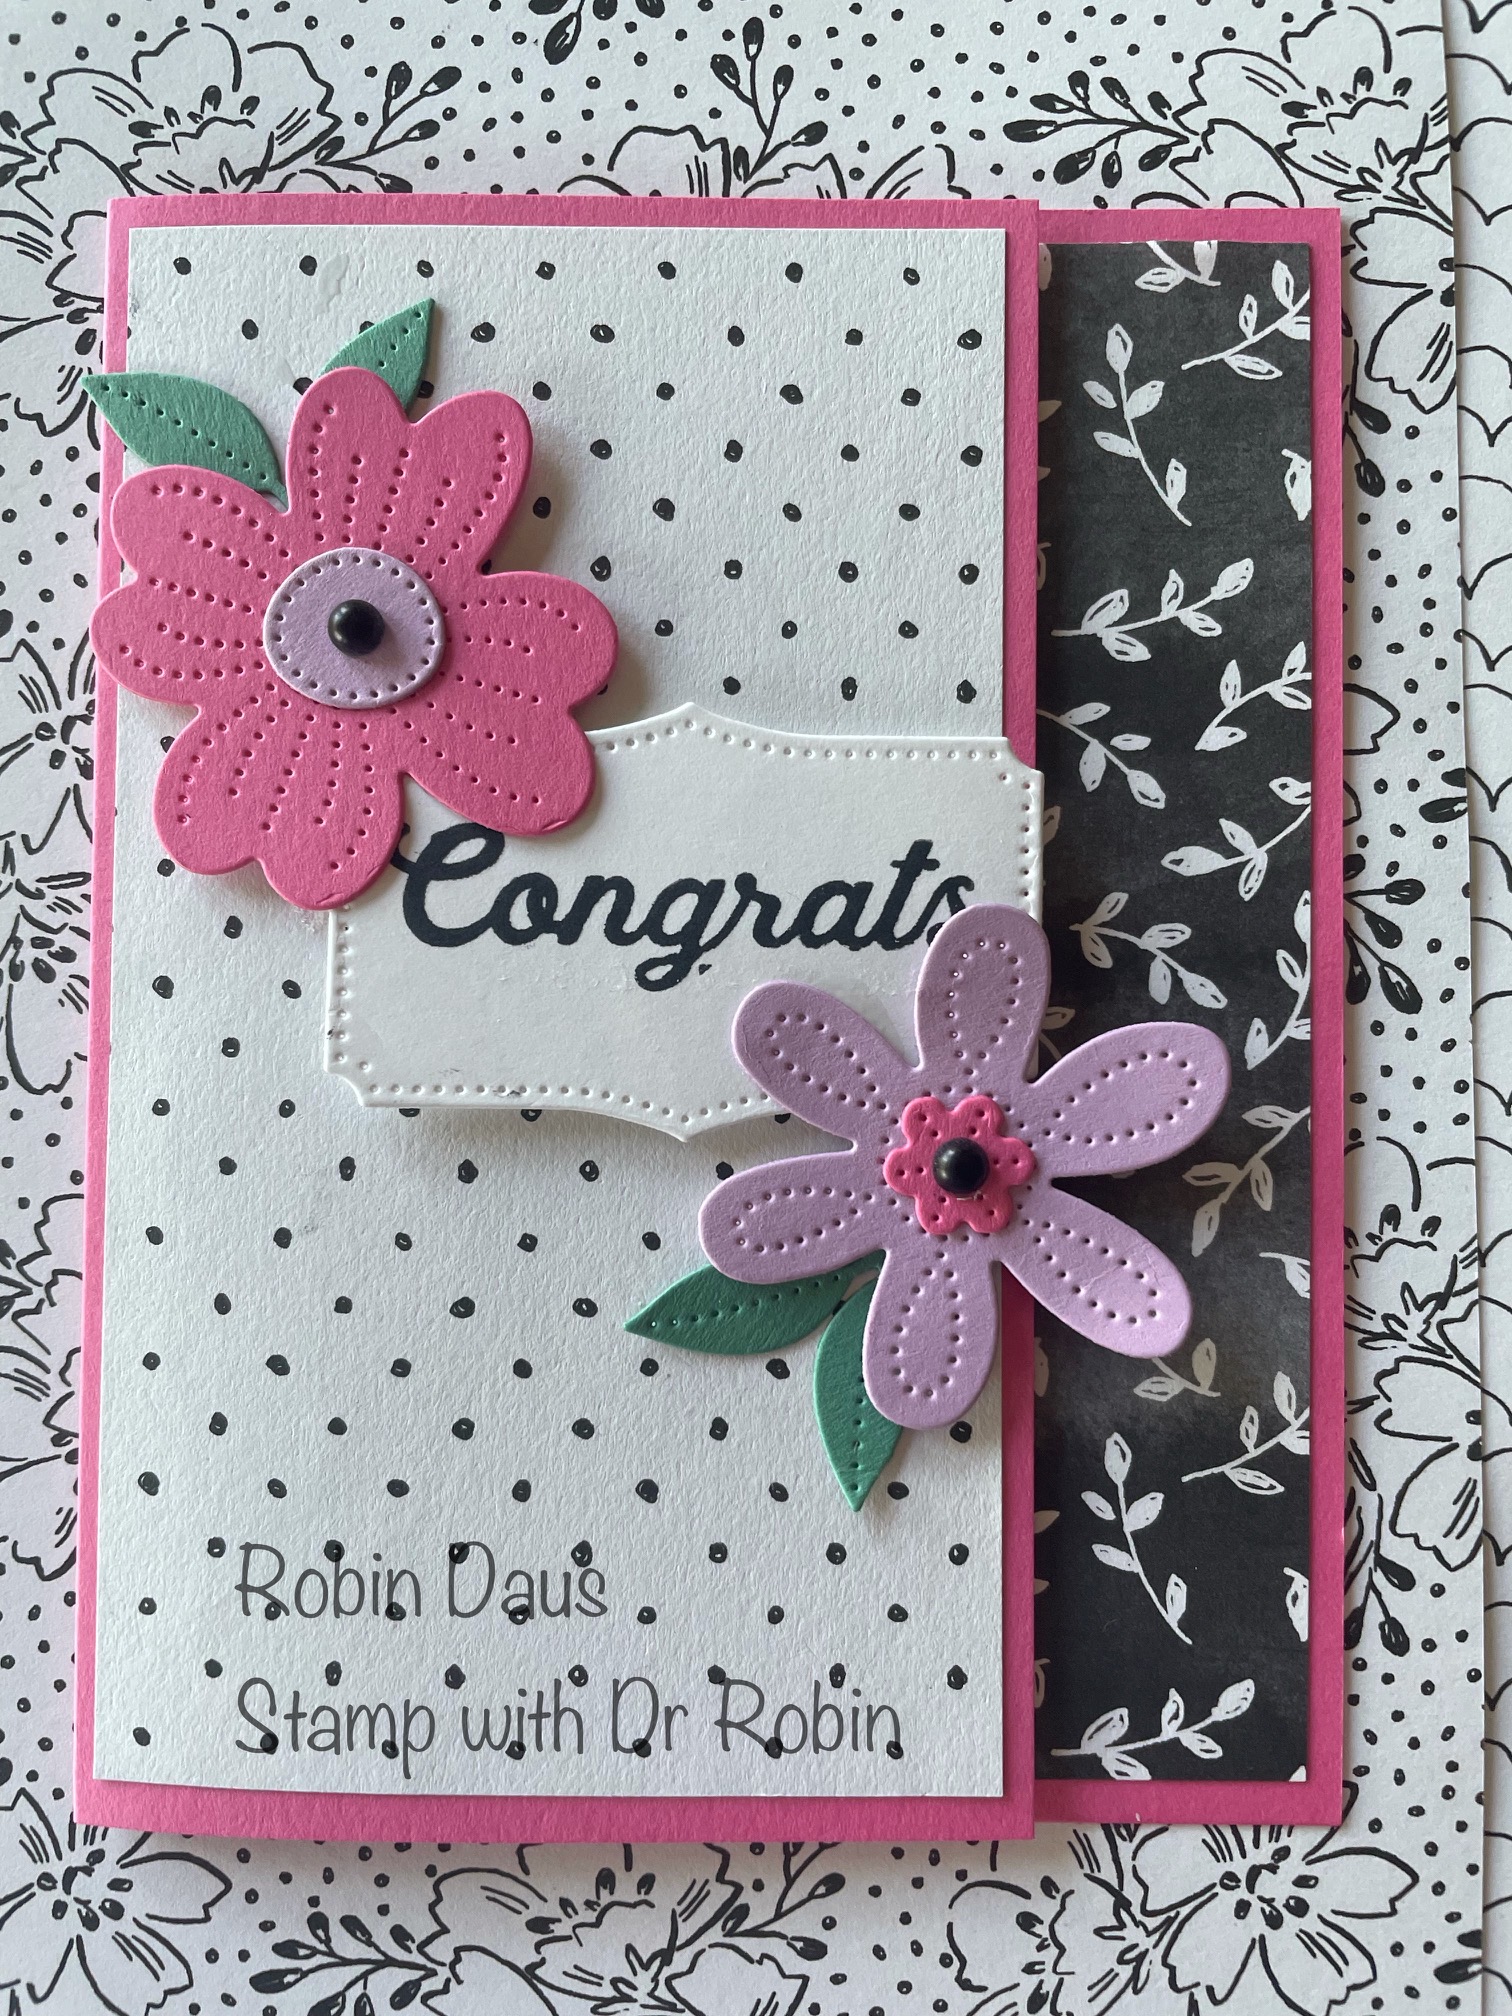
1. Basic Black cardstock cut 8 1/2 by 5 1/2" scored at 4 1/4" on the long side and folded in half. Then cut 1" off the front. And a scrap for the flowers and behind the sentiment piece.
2. Beautifully Penned DSP (# 156630) cut 3 by 5 1/4" (Free SAB item with $50 purchase). If you are making the second card you will also need another piece 1 by 5 1/4"
3. Basic White 3 by 5 1/4" for the inside and a scrap of Basic White for your sentiment piece
4. Be Dazzling DSP (#156629) cut 1 by 5 1/4" (Free SAB item with $50 purchase) and some for the flowers
5. Stamp set--In Bloom (3158218)
6. Dies--Pierced Blooms (#154312)
7. Ink--Memento Black
8. Matte Black Dots (#154284)
9. Basic supplies--bone folder, adhesive (Multipurpose Glue), Regular Dimensionals, Piercing Mat, Take Your Pick tool. You will need some washi tape or painter's tape also.
If you haven't already, cut 1" off the front of your card. Glue the polka dotted Beautifully Penned DSP to the front of the card. Glue the Basic White piece towards the left/fold inside, and then the 1" piece of the sparkly Be Dazzling DSP to the outside of that, making sure it lines up with the front well.
Cut 2 black and 2 Be Dazzling daisy flowers using the Pierced Bloom set. Glue the Be Dazzling flower to the black flower. Cut another black flower of your choice and a Be Dazzling center for the inside of the card--glue these together. If you are doing the second card, I used Polished Pink and Fresh Freesia and Just Jade for a couple of leaves.
Now let's make the sentiment piece. I just wanted to stamp the "Congrats" from the In Bloom stamp set. The whole thing reads "Congrats you're so fancy now" but I really didn't know what I'd use that sentiment for so I decided to not use the second part of it. To do this I used some washi tape and taped off the rest of the sentiment, then inked it up with Memento Black ink. Remember to take off the washi tape before stamping. If you want more instructions on how to do this masking off, watch my video below, or on my Facebook Live (which I do every Monday at 1 pm PST) on Stamp with Dr Robin or my YouTube channel by the same name. This sentiment die piece is also in the Pierced Blooms dies! Cut it out also in Basic Black and cut it in half the long way. Then separate the 2 pieces and glue it to the back of the white piece and you have a lovely black border. It will look like this on the back:

Now attach it to the card using Dimensionals. Attach the flowers with Dimensionals also. Place 3 of the larger Black Matte Dots in the center of each flower using your Take Your Pick Tool.

Place a flower on the inside too, like this:

Now you can use this card for an anniversary card, or to celebrate many other milestones! Here's the 2 cards together:


For this card I used the Basic Border dies to cut the front part of the card and then flipped over the part I cut off and used it on the inside.

My video below shows how to do this step by step. Enjoy.
.JPG)


Comments
Post a Comment