
Everyday Details Sneak Peek

Here's another sneak peak at a wonderful bundle from the 2024 Jan-April Mini Catalog. Although the images and the sentiments in the Everyday Details stamp set are beautiful, the thing I like best about this bundle are the amazing dies. There are nesting rectangles and circles galore and each has a special die that cuts out both the center and leaves little dots around the inside and outside of the cut so you can use the outside one as a frame (they are the ones with the arrows below). The dots cut out easily with just one pass through your die cutting machine and pop out without a problem. For more tips and tricks on making this card, and to go through the dies and how they work with other dies you already have, please watch my Facebook Live below . Then come back every Monday at 1 pm PST to join me for more card making fun! Or you can watch me on YouTube--both are at Stamp with Dr Robin.

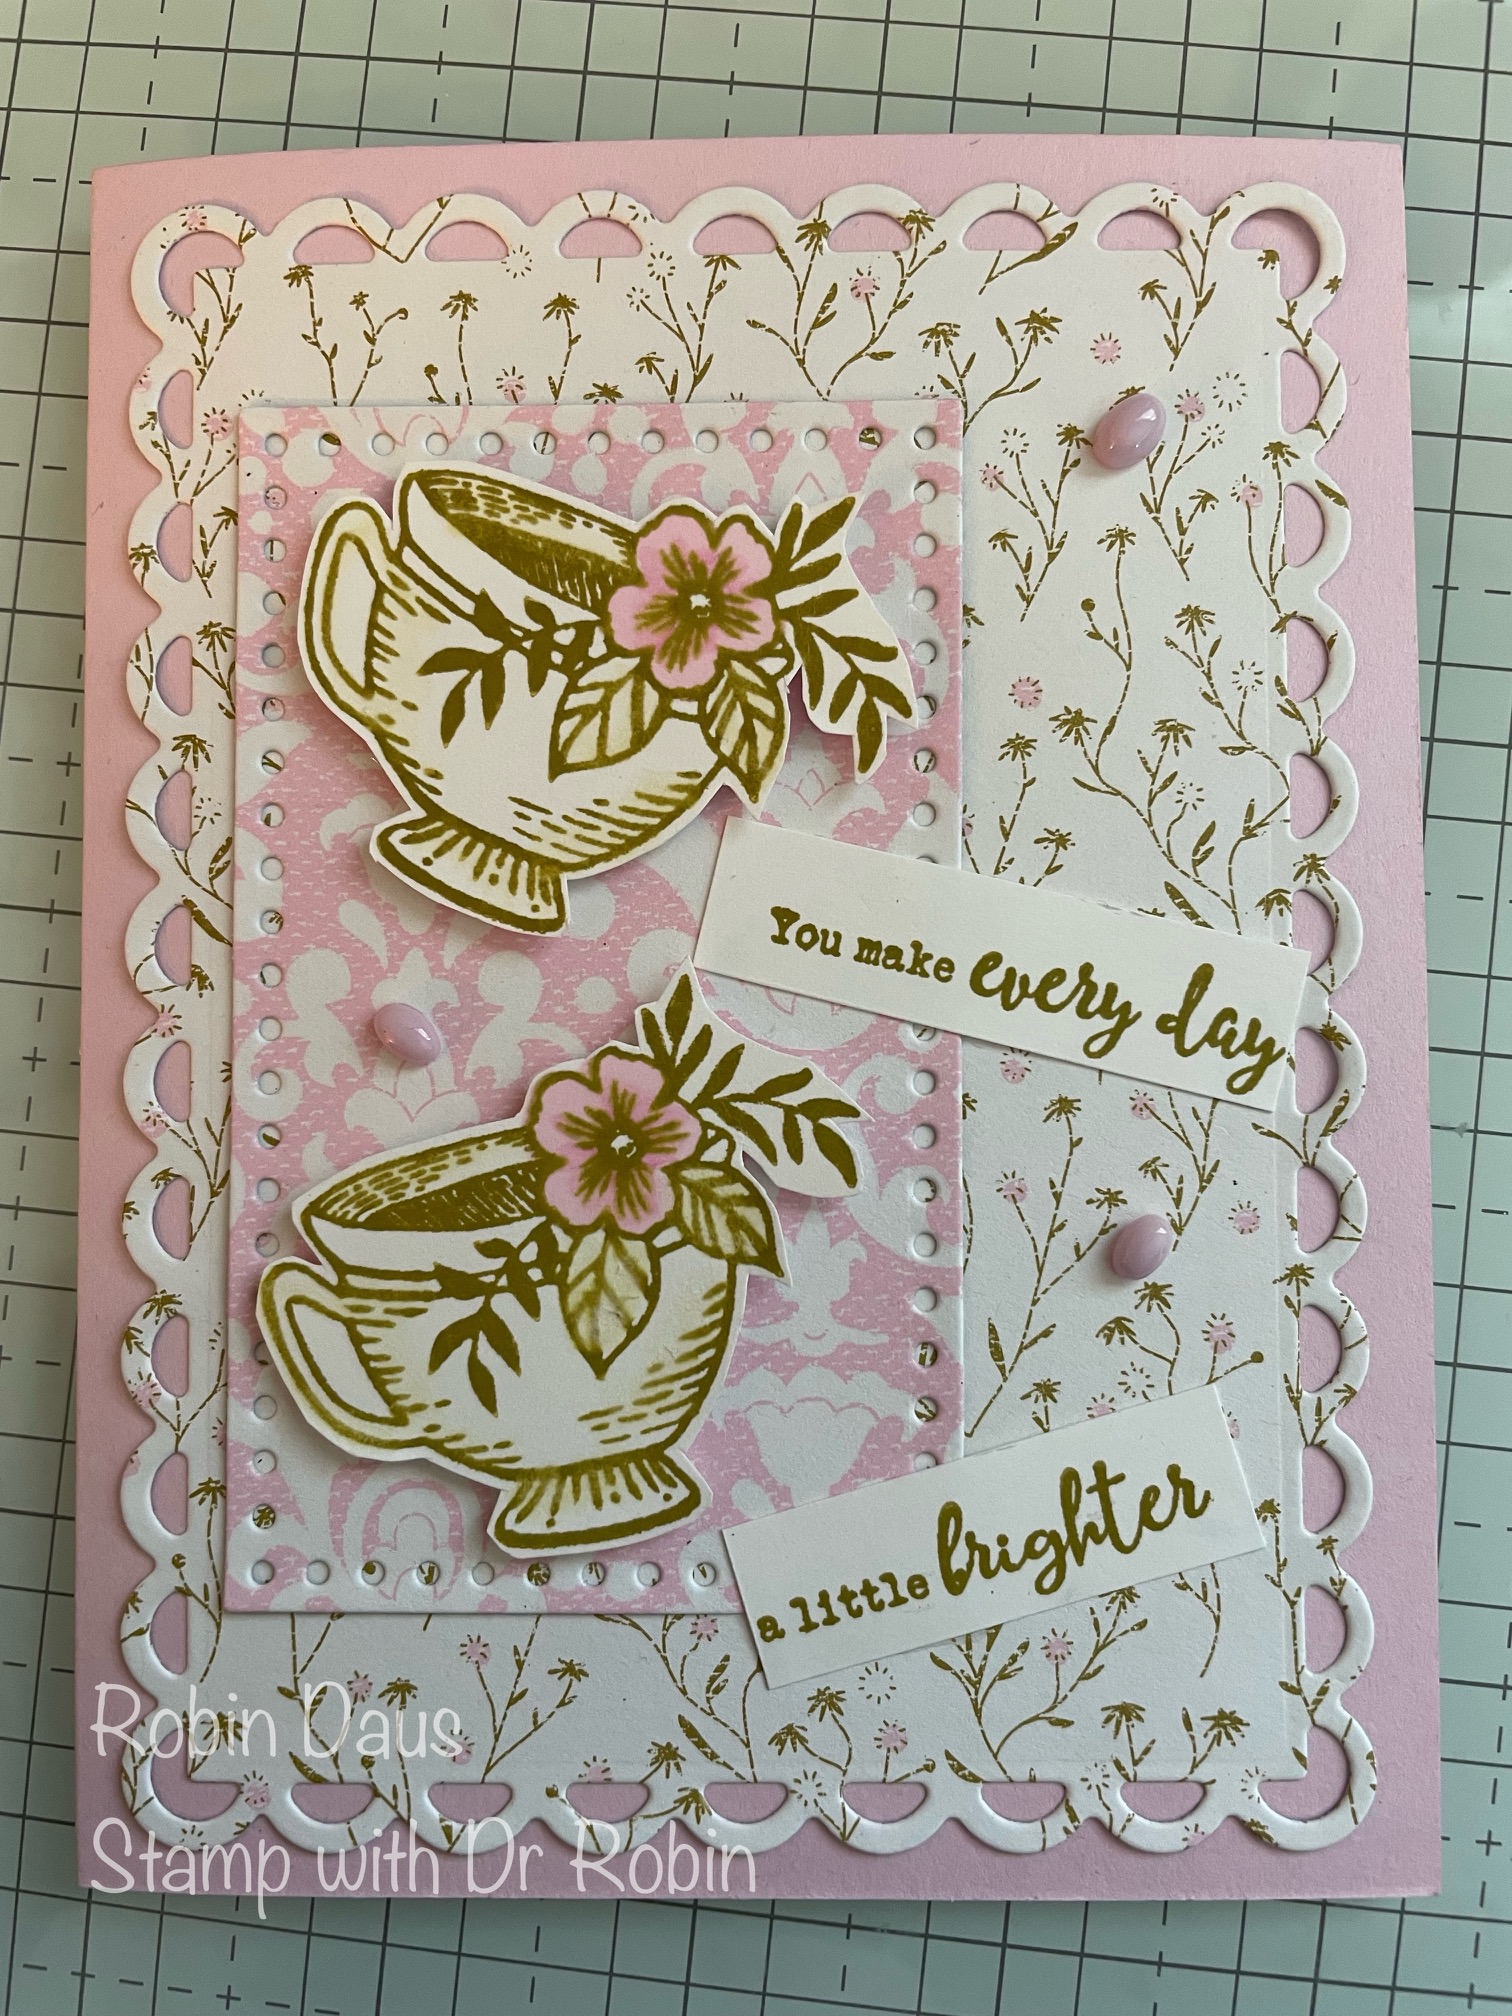
Let's make this card! Gather your supplies:
1. Bubble Bath cardstock --Card base 5 1/2" by 8 1/2" scored on the long side at 4 1/4" and folded along the score line.
2. Poetic Expressions DSP--the one with the tiny flowers 4" by 5 1/2" cut with the largest Scalloped Contours rectangle. Use the Bubble Bath and white paper-- a piece 4" by 5 1/4" cut with the largest Everyday Details die.
3. Basic White cardstock--inside piece 3 3/4" by 5" and a piece (about 1/4 sheet) for the 2 tea cups and a 1/2" strip for the sentiment
4. Stamp Sets--Everyday Details
5. Dies--Everyday Details, Scalloped Contours
6. Ink--Wild Wheat
7. Champagne Iridescent Dots (or Opaque Opals or 2023-25 In Color Dots)
8. Bubble Bath Blends (light and Dark)
9. Basic supplies--Bone folder, Paper Snips, adhesive (I like Multipurpose Glue and Seal+), Paper Trimmer, Piercing Mat, Regular and Mini Dimensionals, Mini Blending Brushes, Cut and Emboss Machine, Blender Pen
Attach the piece of Poetic Expressions DSP that you die cut with the largest Scalloped Contours rectangle to your folded card base. Then attach the piece that you cut with the Everyday Details die to the card base but push it over to the left side of the first DSP piece, centering the top and bottom.
Stamp 2 of the teacups in Wild Wheat on Basic White cardstock. Before they dry, use your Blender Pen to move around some of the ink to help shade the sides of the cup and the leaves. Color the flower using the Dark (towards the center of the flower) and Light Bubble Bath Blends. Fussy cut the cups out. Attach them to the card using Mini and Regular Dimensionals.

Using Wild Wheat ink, stamp the sentiment on your 1/2" scrap of Basic White cardstock and cut it in half. Adhere to the front (I used glue). For the inside, stamp a teacup and color in just the flower as you did on the front. Attach to the inside of your card, adding a sentiment if you'd like prior to attaching it.


Here's the same card using 2023-25 In Color Dots and Opaque Opals.

Below is my Facebook Live from 12/25/23 where I make this card, and show you some tips to help with the cardmaking. Join me every Monday at 1 pm PST for some cardmaking fun over on Stamp with Dr Robin on Facebook. Or follow me on YouTube with the same name (be sure to hit the Subscribe button while you are there). And let me know if you have questions. You can click on the red Robin above left to order from my store.
Happy Stampin',
Robin
.JPG)


Comments
Post a Comment