
Sophisticated Sled Sneak Peek

I made this card with the upcoming Online Exclusive bundle Sophisticated Sled. This bundle debuts on 7/3/24 and will only be available while supplies last and will not be in any catalog, so if you love this bundle as much as I do, snag it quickly. It's not in a suite and this is what the stamp set and dies look like--I love the variety of images and sentiments in the stamp set. And the dies are lots of fun. I think it will make great holiday cards, but today I thought I would make a card that you could use for anything.


Let's make this card! Gather your supplies:
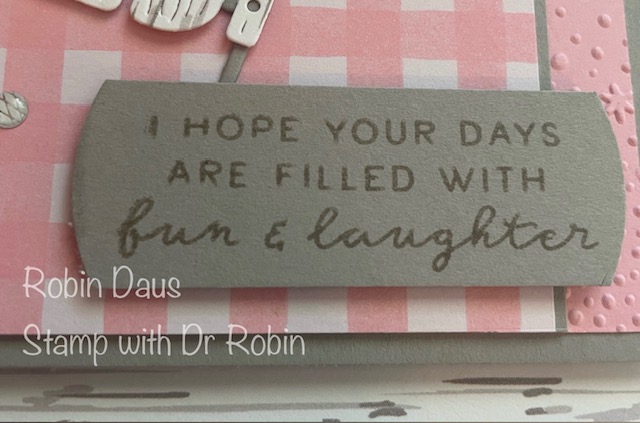
1. Gray Granite cardstock --Card base 5 1/2" by 8 1/2" scored on the long side at 4 1/4" and folded along the score line. Second piece 3 1/8" by 5 1/4" and a scrap 7/8" by about 3"
for sentiment
2. Lily Pond Lake DSP--cut the Pretty in Pink plaid/checkered piece 3" by 5 1/4"
3. Nests of Winter DSP (this will be available in the Sept-Dec Mini Catalog)--piece to cut the sled. You can also use any wood DSP
4. Basic White cardstock-- 3 1/2" or 3 3/4" by 5" for the inside. A scrap to cut the ice skates
5. Silver foil--die cut 2 skate blades
6. Pretty in Pink cardstock--A piece 4" by 5 1/4" and die cut 2 of the laces (you could even from the center of this piece)
7. Stamp Sets--Sophisticated Sled
8. Dies--Sophisticated Sled
9. Punch--Modern Oval
10. Embossing Folder--Snowflake Sky 3D
11. Pecan Pie & Clear Ribboned Adhesive-Backed Dots (another upcoming Online Exclusive)
12. Basic White twine--about 26"
13. Basic supplies--Bone folder, Paper Snips, adhesive (I like Multipurpose Glue and Seal+), Paper Trimmer, Take Your Pick Tool, Regular Dimensionals, Cut and Emboss Machine, Mini Glue Dots.
Run the Pretty in Pink cardstock through your Cut and Emboss Machine inside the Snowflake Sky 3D Embossing Folder. Cut the sled frame from the center of the 3 1/8" by 5 1/4" piece of Gray Granite cardstock. Cut the embossed part of the frame from the birch piece of Nests of Winter DSP--this paper doesn't come out until Sept, but I was able to get it early as part of a special demonstrator-only class I took this weekend (another perk for being a demo). If you want to see more of this paper, watch my Facebook Live below. It will also help you to put the skates and sled together.
Attach the 2 pieces of birch paper to the sled frame. To make the skates, attach the silver foil blades to the bottom of the skate and slip the laces pieces into the die cut slit in the skate shoe and glue them in place. Attach the skates together with a bit of glue.

Stamp some snowflakes on the Basic White inside piece and attach it to the folded Gray Granite card base.

Time to put it all together. Attach the Pretty in Pink snowflake piece to the card base. Attach the plaid/checkered DSP to the 3 1/8" by 5 1/4" piece of Gray Granite then attach that to the card. Attach the sled. Cut the white twine in half and then tie both pieced at the same time, making a double bow and attach to the top of the sled using a Mini Glue Dot. Put Dimensionals on the back of the skates and attach to the sled, catching the inside 2 strings of twine underneath (you will probably have to cut the twine a bit. Attach the sentiment using Dimensionals. Stick on 3 of the Clear Ribboned Adhesive-Backed Dots and you are done. Here's another picture. Let me know if you'd like to order any of these products or click on the Robin above left.

Happy Stampin',
Robin
.JPG)


Comments
Post a Comment